Category Archives: Recipes

Frankenstein your items….

Hey 'machiners!

Did you know you have the means to create your own items out of others?

There is a whole bunch of possibilities when using the masking tool and "frankenstein" them together.  Here is an example....

I took 2 Croc heads from HEADS/ANIMAL section and did this....

Took a 3/4 turn item and made it head on.  Pretty cool, eh?

Here is how I did it...

There are treasures to be found in all item categories.  Happy hunting!

***For a more in depth step by step post, please visit this page created by SULEMAN.

http://www.heromachine.com/2016/05/06/submission-box-suleman-tutorial-frankensteining/

Stay Safe and Cheers!

Submission Box: Suleman Tutorial: Frankensteining

Greetings Fellow Machiner,

I am starting off a new feature for the blog called Submission Box. If you have something you'd like to share with the community be it a tutorial, a heromachine "recipe" A cool youtube video you found, a great article you found on the web you can email me and submit it for the submission box. I will take a look and if I approve I will post it on the blog. Submissions will be posted as I have time you look at them, so some days you will have 5 or 6 Submission box posts and some days you will not have any. ...

Well lets get started with our first Submission box, which is a tutorial from community member Suleman which you will find after the jump........

Continue reading

Hammerknight's Recipes

I'm back with a few tips for you when you are making your characters. This is my first try using the wooden figures, I hope you like them.Flying pose 1 top view looking down

Character Design Help

Hi all, I'm back. I missed posting and talking to everyone. I'm not back to full power yet (and don't know if I can get there), but I'm going to see what I can do. Over the years working with Hero Machine, I have noticed that some people need help getting a character just the way they want them. I have helped with giving recipes (I may get back to them here in the future) and trying my hand at doing the design and showing what I have come up with. Most of you know that I mainly do the plain Jane characters, not all the Zypping and extra shading, I like the way the characters look just the way they come out of the machine. I'm not saying the other ones are not good, because they are great, it's just not my cup of tea. So to get to the topic at hand, "Character Design Help", here is the way this works.

Ask for help with any designs you need too. If I can not answer the question, I am sure one of the other creators can put their two cents in and we can help you work things out. You can post a sample picture of the design you want to make and I will give it a try to see what I can come up with. Other creators are welcome to show what they come up with too. Remember this is a "help" post, if you want to share your characters you are welcome to post them in the forum, we would all love to see the work you do posted there. It really is a great place to share your art, or just to talk to other creators, it is a friendly place for all ages to visit and enjoy. Always keep in mind that we can not do copyrighted characters here, I know that there are designs and styles of characters that you would love to have your character look like, but we need to play it safe. This being said, ask for help with making the design and not for making the character. Try to keep your help request to one a week for now, until I am able to get my legs back under me. I will try to respond as soon as I can, I'm am not as fast as I was before. If your request is not answered with in the week posted it does not mean that it is not being worked on. I will try to let you know if I am able to help or not. Remember other creators are always welcome to help out.

As always, please forgive me for spelling and grammar mistakes. Thanks, Hammerknight.

Tutorials

We used to do a series of tutorials 'round these parts, which you can access here or here.

Since this came up in the contest thread, I just want to point out that anyone at all is more than welcome to put together one of these. Write it up however you like and email it to me, and if it seems like something helpful I'll post it.

If you'd rather not be that formal, I'd definitely encourage you to post them on the "Tips & Tricks" forum. That's open to anyone who's registered and you can do it up however you like.

Sunset recipe by Nick Hentschel

Instead of the usual Power User Profile, we have a special treat today -- Nick Hentschel has graciously put together a nifty how-to recipe for your own sunset backgrounds! I know he put a ton of work into this, so please let him know in the comments that you appreciate the effort and the willingness to share.

Note that you can click on most of these screen captures to see them at maximum size. Without further ado, I give you Nick's recipe!

Continue reading

Face!

The always awesome Zyp has graciously put together a brief guide on how you can create incredible looking faces in HeroMachine 3 just like he does! I've always been impressed with the dimensionality and personality he gets into his characters, and really appreciate his sharing his secrets with us. Thank you, Zyp!

Sunset recipe

Many thanks to unknownblackpaper for providing this nifty recipe for making a sunset in HeroMachine 3:

Continue reading

META: New home for custom items

I've just created a new forum on the UGO HeroMachine boards for the sharing of custom HM3 items along the lines of what Martian Blue proposed the other day. I've broken it down into several sub-folders so hopefully those searching for specific items will have an easier time finding them. If you have suggestions for different categories, by all means speak up. Currently they are:

  1. Male Clothing
  2. Female Clothing
  3. Backgrounds
  4. Companions / Complete Characters
  5. Headgear
  6. Weapons
  7. Miscellaneous Items

Currently they're all empty, so you've got a chance to be the first one to add anything to each of them!

Fire Recipe by Me, Myself, and I

In response to Jeff’s (not so subtle ☺) suggestion that we could use a Recipe for making realistic fire with HeroMachine I have put this together.

There are a few things I consider when producing fire imagery;

  • It contrasts greatly with whatever is around it;
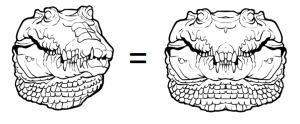
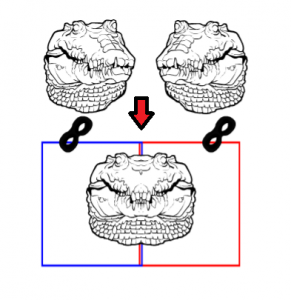
  • It is never completely symmetrical but it is often balanced;
  • Because it is a light source, the color and intensity of close by objects will often be affected;
  • It is always transparent but in varying degrees;
  • It varies in color and can include greens, blues, reds, oranges, yellows and even whites;
  • Fire also engulfs objects.

The major challenge with making a recipe for fire is that it does not have a static form. Therefore this recipe will be kept very general with few specifics.

Step #1 – Background
I referred to contrast previously and a really dark background can make a bright subject really pop off the page. I just used a dark background rectangle and filled the entire screen with it.

Step #2 – Burning Object
What fire is complete without something to burn eh? (Yes I did just include “eh” at the end of my sentence. I’m Canadian so I figure I’m allowed☺). This time I chose a skull because it’s dark and sinister.

Step #3 – Shading
Certainly not necessary but I often like my objects to have some shading. I selected the last item in the Backgrounds > Shapes section and gave the Primary color an Alpha of 0%. The Secondary color has an Alpha of 75% and is black. Sized like the image here and centered over the skull makes the edges of the skull darker while the center remains lighter. This should give the skull some depth. The Line Color is left as white to illustrate here but will be subsequently changed to an Alpha of 0%.

Step #4 – Flame Elements
I like to use a few different objects to make flames. I do this so that the same shapes do not appear readily. As the image progresses I will add literally dozens of layers of just the flames and the will begin to overlap. There are a few elements available that work easily for flames and here are a few examples before I start to color and layer them.

Step #5 – Adding the Fire
I will layer numerous layers of each of the flame objects. As mentioned previously, flames are not symmetrical so each object will be changed in size, shape and rotation to reduce the same shapes showing up repeatedly. Furthermore, the level of transparency changes as well so the Alpha levels will be changed for each object as well. The torch and glove may seem like unlikely additions but the flames on the torch are really good if the Line Color and the Primary Color Alpha 0 ratings. Some of these objects will be in front of the burning object and some will be behind. The torches in particular are placed behind the object so that the lines aren’t so obtrusive. The glove works quite well for small wisps of flame if the Primary Color and Line Color are made to have Alpha values of 0.

Step #6 – Review
Because the fire covers the burning objects the underlying items often look different than anticipated. I usually find it is good to review the burning object to make sure the coloring and clarity is still what was desired. Feel free to experiment with other objects or coloring to decide what meets your desired objective. In the end it is the methodology or strategy and experimentation that is important and produces results; not any one detail.

Step #7 - Alternatives