
You don't have to know how to draw to create characters with the HeroMachine, but there's still nothing like making your very own custom illustrations. So from time to time, I'll be posting suggestions on how you can use your computer to do just that.
Before I start, I wanted to say a brief word about the tools you'll need. At a basic minimum you'll need a computer (duh) and some software to draw in. I use Flash because I like its organic feel, plus the fact that it outputs vector art means I can give my client an image at literally any size they want, from a small web graphic to a giant mural, and it'll always look sharp. I also use a Wacom Graphire 4"x5" pen tablet for the actual drawing. It lets me vary the thickness of the line just like I was inking with a brush, but you can just use your mouse if that's what you have. For software, I'll be using Flash MX throughout this tutorial.
And now, on to our first lesson -- layers!
Open a new Flash document and note that there is already one layer active by default. I've renamed it to "rough1", and it's in the upper left-hand corner of the screen capture. I choose black for my pen color, and sketch out a very rough outline of what I want. In this case, I'm going for a barbarian swordsman.
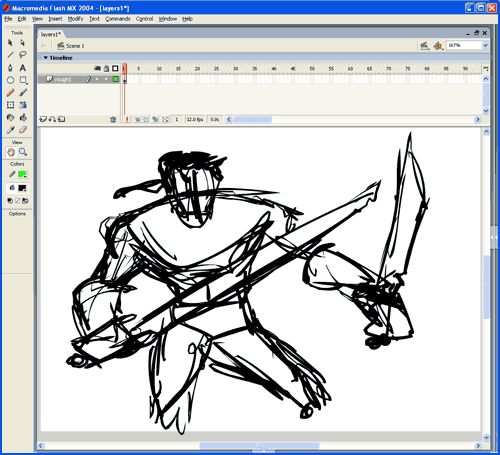
At this stage you're just roughing out the figure, you don't want to spend much time getting any detail work done. Use general geometric shapes -- I've got rectangles to represent the fists, a modified cone for the chest, a cylinder for the head, etc. All you want to accomplish here is to lay down a basic roadmap of where you want things to be.
Once you're happy with the basic layout, choose "Select All" and change the black color to a light gray. Create a new layer over the first one, and lock the original "rough1" layer:
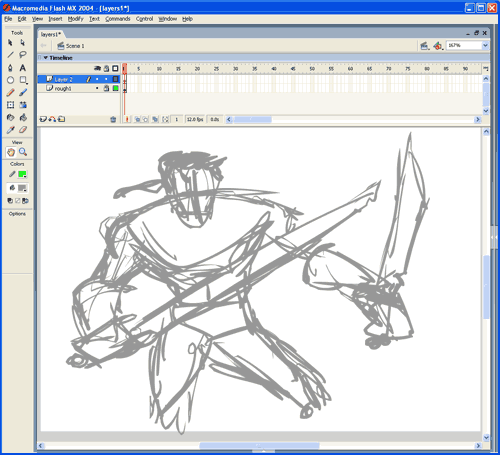
You want to be able to see your rough layout, while still being able to draw on top of it. In the old days, the gray layer would have been a pencil sketch and you'd put a piece of transparent tracing paper over it. This way is much faster!
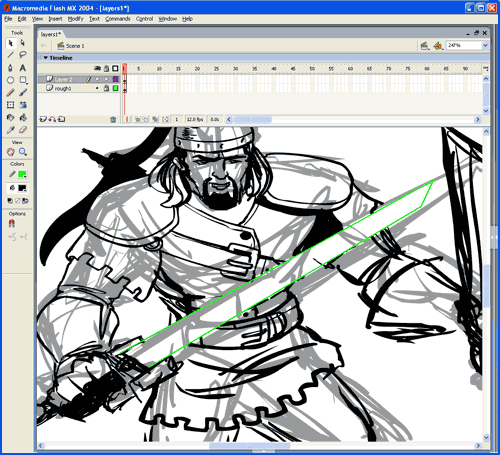
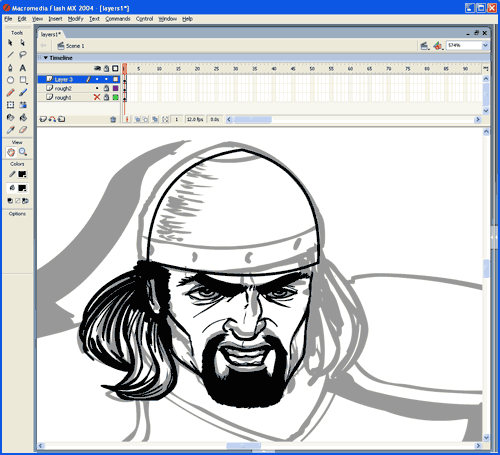
Change your ink color back to black, and zoom in on the part you want to draw. The idea behind this stage is to firm up your rough sketch, but still not with a "final" level of detail. You're mostly going for major areas like eyes, clothing, equipment, and that sort of thing. Notice how you can still see the light gray from the first rough beneath the layer I am actually drawing on:

One of the nice things about Flash or Illustrator (the most popular vector-based illustration software) is that you can really get down into the nitty gritty to get the details right using the Zoom feature. Continue roughing out your figure until you've got all the important bits pretty much how you like them. As I kept working on this figure, I knew that the sword in his right hand would cross over the body, obscuring it. But I went ahead and drew in the body, because trying to match the lines up on either side of the sword would be really hard, and probably wouldn't look right. Instead, once I had the body roughed in, I dropped in two lines for the edge of the sword, using a bright color I could easily see against the black.
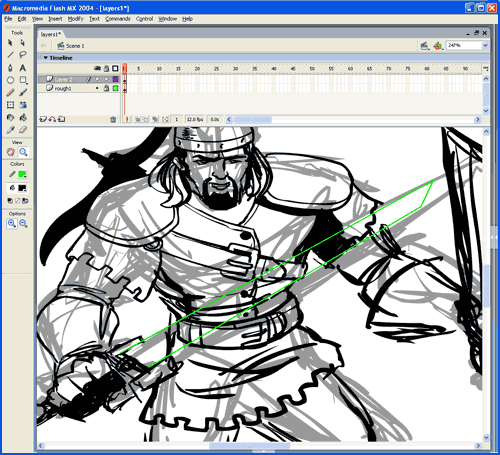
Flash lets you select contiguous color areas by just clicking on them, so that's what I did -- I selected all the black of the body that's behind the sword, and deleted it:
As you're drawing on the "rough2" layer, every now and then you'll want to hide the "rough1" layer beneath it so you can see how the figure looks without all the clutter. You do this in Flash by just clicking on the dot beneath the eye in the Timeline (at the top of the screen). Note how "rough1" has a red "x" there, indicating that the contents of that layer are currently hidden:
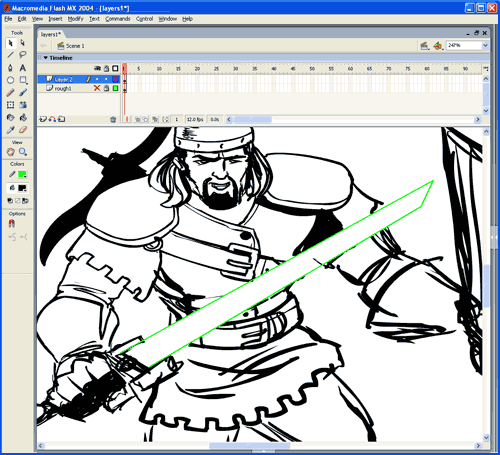
Having done this, I can see that the sword in the left hand (which as it turns out is going to be a shorter, thicker, nasty-looking cleaver type of thing) is way too far out -- if I don't move it in, it's going to look like his hand has been severed and stuck on the end of a pole. Luckily this is easy to do -- just use the lasso tool to select the sword and hand, and drag it closer to the figure until it looks right.

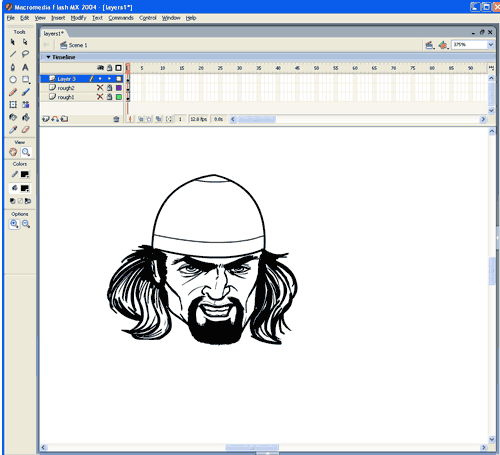
When you've got everything filled in at a level that looks good and you're ready to start with the final inking, once again select all, change the color to light gray, create a new layer, and lock the previous one (rough2). You're now ready to ink the final, detailed illustration on the final layer. Zoom in on the area you want to start with (I usually do the face first) and get to work! Just like before, occasionally hide the rough layer to see the black ink by itself to make sure everything looks right. Lasso bits that look "off" and rotate, squish, and move them to their proper place. In this drawing, for instance, the right eye was way too big, so I had to resize it. The helmet was also askew, so I straightened it out to fit properly on the head:
And here's what the final ink for the head looks like:
Keep going like this until the figure is completely inked. The keys are to keep turning the rough layer on and off to check your work as you go; zoom in to get the fine detail work done; and don't be afraid to move whole chunks of anatomy around until they're right.
Once you're done, it's time to color your illustration, but we'll save that for the next lesson. Good luck, and good drawing!
