
Home › Forums › The HeroMachine Art Gallery › Tips, Tricks, How-Tos, and Guides › How to Highlight/Shade…….
- This topic has 21 replies, 16 voices, and was last updated 5 years, 3 months ago by
 ams.
ams.
-
AuthorPosts
-
May 14, 2012 at 11:21 pm #267

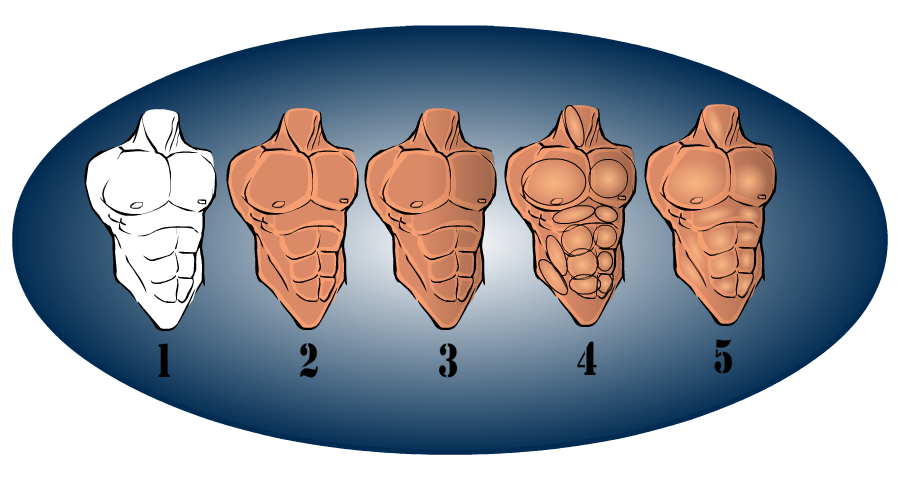
amsParticipantThis is a beginner’s guide to show you how to highlight or shde a character. Hope it helps!

Step 1- Select item.
Step 2- Choose coloring.
Step 3- Add secondary pattern gradient
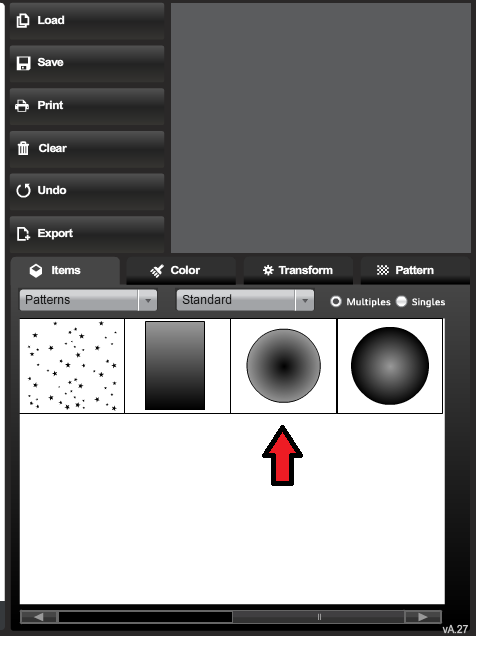
Step 4- Goto to Patterns-Standard, choose indicated item.
Reduce color to ZERO on the Primary color, adjust size of item to fit the area you are highlighting and choose color to highlight with for your secondary. After you have place in desired location, reduce line color to ZERO.
Step 5- Voila! Highlighted Item!
If you want to shade, use black or a darker color on your secondary color of your pattern item.
Don’t be afraid to experiment with all colors!May 15, 2012 at 9:51 pm #5501
HammerknightParticipantGreat job.
May 16, 2012 at 9:40 pm #5548
ShiborethMemberIt took a little bit to understand what picture 4 of the body was supposed to be, but I follow it now! And so now I have been abusing this technique thoroughly. Thank you for posting it!
July 17, 2012 at 12:45 pm #7631
PsikicMemberSo, I hate to sound incredibly dense, but I’m new to this version of Hero Machine. I can’t seem to find some of the places/things that you mention in your tut. Can you elaborate a bit on the steps?
July 17, 2012 at 12:49 pm #7634
Kaylin88100ParticipantWhat specifically don’t you get?
July 18, 2012 at 1:00 am #7664
Herr DParticipantK! One of the clearest tutorials I’ve seen.
 July 18, 2012 at 8:17 am #7672
PsikicMemberI guess I’m not quite understanding how to add the gradients, and what is being explained in Step 4. After I click on the gradient, it darkens half the figure. Then, I select the Item tab–>Patterns–>Standard, Click on the indicated circle, and I just get a big circle covering most of my figure. Where am I going wrong?
July 18, 2012 at 8:42 am #7674
FRMParticipantthat’s what’s supposed to happen. on the gradient there are colors, on inside an one around it (fading into each other), with the circular border around both. when you first select it, both colors are white, so you cant see where they are. what u need to do is go to the color tab, and make color 1 transparent, using the (i’m not sure what it’s called), labeled “Alpha” in the top right, by dragging the little bar-thingy left (or typing 0 into the number box next to it). change the line color to 0 as well. next you can change the color of color 2 and modify it’s transparency however you like. you might want to change the item’s size (in the Transform tab), as well. i think it says how in another thread. i dont know how to explain that part.
hope this helps.
August 11, 2012 at 12:43 am #8964
Bad-PeopleParticipantI’m trying to experiment with this a little, but I’m having a lot of trouble figuring out how to shade hands, hands that are grasping something are even harder. Do you have any advise?
August 11, 2012 at 2:07 am #8968
TrekkieParticipantI think you could try just shading them in a normal way first- dark gradients in shadowed areas, and lighter ones as highlights. Then, use small white gradient circles on each of the knuckles. Not sure how useful that is, but it’s an idea- hope it helps.
August 11, 2012 at 6:31 am #8977
Kaylin88100ParticipantIf you can’t figure out where the shadows should go, try working from observation – find some pictures, or look at your own hand to see where the shadows fall.
August 11, 2012 at 4:47 pm #9017
Bad-PeopleParticipantMy problem is with the shadow gradient, it doesn’t work the same way with hands. I’ve tried hiding a duplicate hand under the first and masking a transparent grey insignia over that, but it’s hard to get it to match up with the arm.
August 18, 2012 at 10:21 am #9460
fuzztoneMemberThe gradient side of things can be a bit tricky to get right with the smaller items, such as hands. What you can do is to duplicate the hand or item, making it with the same size and location values as the first one, and then mask a gradient on to that. After you’ve masked the gradient to the hand, turn the colours down to zero on the duplicate hand and send it to the back layer of the image (layer 1, probably) so that it’s out of the way. The masked gradient, though, will stay where it was, and you can then change the size, colour, etc, to your heart’s content, knowing that it will always only show up in the boundaries of the hand.
October 20, 2012 at 4:14 pm #12642
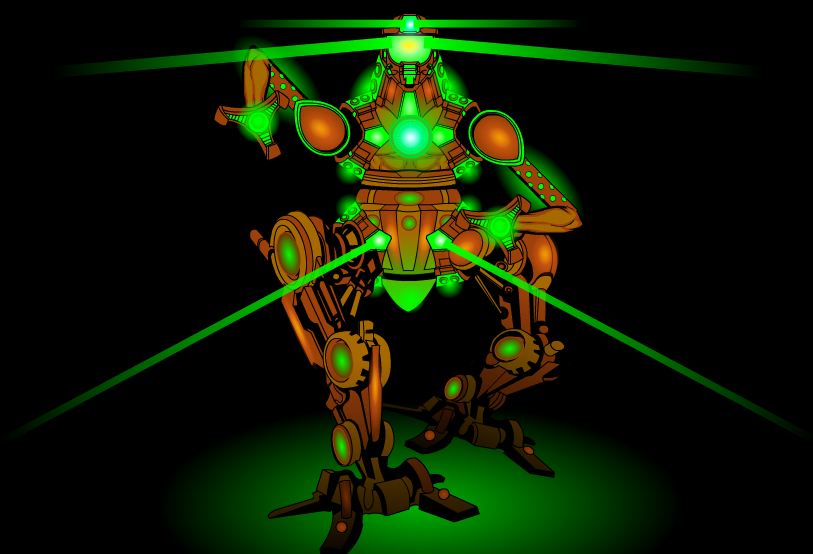
SeraphMemberThis might be an obvious and/or dumb question, but you would use this same technique to do lighting effects, right? I’ve seen some pretty amazing effects…a great, recent example would be like DJuby’s Rustbuckett (http://www.heromachine.com/wp-content/legacy/forum-image-uploads/djuby/2012/10/djuby-rustbuckett.JPG).
October 21, 2012 at 10:28 am #12715
amsParticipantYes you can. Good example. I also use it to get a reflection/shine effect off of metal items.

-
AuthorPosts


You must be logged in to reply to this topic.
